The Ultimate Guide to Artificial Grass Installation: Tips and Tricks from Turff Masterz

Artificial grass is becoming an increasingly popular choice for homeowners in Tampa and the surrounding FL areas. Its low maintenance, durability, and aesthetic appeal make it a fantastic alternative to natural grass. As leading artificial grass installers, Turff Masterz is here to provide you with the ultimate guide to artificial grass installation, ensuring your yard looks pristine year-round.
1. Preparing Your Yard
Before any installation begins, proper preparation is crucial. Start by clearing the area of existing grass, weeds, and debris. This can be done using a sod cutter or a shovel. It’s essential to remove all organic material to prevent future weed growth. Once the area is cleared, level the ground to create a smooth surface. For Tampa’s sandy soil, add a layer of crushed rock to improve stability.
2. Installing a Weed Barrier
A weed barrier is a must for long-term maintenance. Lay down a high-quality weed membrane to prevent weeds from growing through your artificial grass. This step is particularly important in the humid Tampa climate, where weeds can thrive.
3. Laying the Base
The base layer is the foundation of your artificial grass installation. To create a stable base, mix crushed stone and sand. Spread the material evenly and compact it using a roller or vibrating plate. Aim for a 2-4 inches depth to ensure proper drainage and a solid foundation.
4. Cutting and Positioning the Grass
Unroll your artificial grass and let it sit in the sun for a few hours. This helps the grass blades stand up and makes the material easier to work with. Measure and cut the grass to fit your yard, ensuring the grain of the grass blades all face the same direction for a natural look. Use a utility knife for precise cuts and make sure the edges are snug against any borders.
5. Securing the Grass
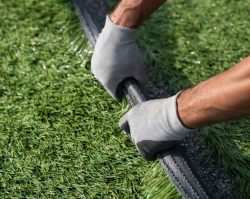
Secure the edges of the artificial grass using landscape staples or nails, placing them every 6-8 inches. For larger areas, you may need to use adhesive to join multiple pieces of grass. Ensure there are no gaps or overlaps to achieve a seamless appearance.
6. Adding Infill
Infill helps to support the grass blades and provides cushioning underfoot. Silica sand or rubber granules are common choices. Spread the infill evenly across the grass using a drop spreader, and then brush the grass with a stiff broom to help the infill settle and the grass blades stand upright.
7. Final Touches
Once the infill is in place, brush the grass again to achieve a natural look. Check for any uneven areas and adjust as needed. Regular maintenance, such as brushing and hosing down the grass, will keep it looking fresh and vibrant.
Following these tips and tricks from Turff Masterz, your artificial grass installation will be beautiful and long-lasting. As premier artificial grass installers in Tampa and the surrounding FL areas, we’re here to help you achieve the perfect yard with minimal effort.
For professional artificial grass installation services, contact Turff Masterz today at 813-810-2947. Transform your outdoor space into a lush, green oasis!


